Showing posts with label Web. Show all posts

Saturday, February 19, 2011

Chocolate-cake box

Hey you guysss!! ;P
Valentine's Day here in the U.S. in on February 14th but in Brazil is in July 12th and my husband is very lucky because this year (just like the year before) he'll get sweet treats for both Valentines Day! :D For the american V-day I made him a very special cake. It's a cake that I saw on Bakerella site a while ago and I always wanted to try. It's a heart- chocolate-box made out of cake and fondant! Super cool!! :) And to get better... the "cake-box" is filled with cake truffles (which are the same thing as cake pops just without the stick).
My hubby loved his gift! The flavour of the cake is dark chocolate and I used cream cheese buttercream (OH MY GOSH, this is so yummy!! I totally recommend!!) that I also got from Mrs. Bakerella and you can find the recipe here.
I hope you like it!! 
And there it is... the "box" of chocolate! yummy!!
Tha cake truffles
More truffles
Oh, oh... a broken heart... ;P

Happy Baking!!

Thursday, February 10, 2011

My first order.... :D


Hi guys!
Couple weeks ago I had my first order!  It was for a very special boy who is my son's best friend. He wanted a Toy Story b-day cake, so I  accept the challenge and went straight ahead  to start modeling the Woody and Buzz for the first time in my life ... I even can say this: modeling for the first time in my life!! I searched the internet a lot trying to find a lot of inspiration and then I remembered that one of my friends, Chris Parga, from  B de Bolo had done a wonderful cake from Toy Story before. I recommend you stop by her blog! She is a lovely person and I'm super fan of everything she does! And I was inspired on the cake she made. Now I have to say ... modeling characters is not easy, ok?! I spent 3 days to assemble the dolls! I thought the result was pretty cool. But I know I still have a lot to learn!

Happy Baking!!!

Tuesday, January 11, 2011

Wedding and "bem-casados"


Happy New Year! Wow, it has been quite a while since I 've been here, huh?! Sorry!! But I was on vacation and enjoying some time with my family that was here.
I have great news! My dear friend Flavia from Cupcake Delicious got married! Yes, she is now Mrs. Cupcake Delicious! And to make this even better her wedding was in Las Vegas! Très chic and of course I went with my husband! In Brazil there's a lovely tradition to give to each guest a "bem-casado" which is basically a cookie (looks like a whoopie pie). There's no wedding without it in Brazil and I was very honored to make them for Flavia's wedding. The filling was white chocolate brigadier (which is another brazilian tradition, it's like a fudge) and the batter was made with a special sugar that I made with vanilla beans. I was very happy with the result and I think that her guests were happy too... 
Honestly that was the best wedding I ever was, no kidding! It was a small wedding because not manny people could come to Vegas but her family was so excited and happy to be there that transformed the place! The party was amazing! 
 I wish all the happiness and love for Mr. and Mrs. Cupcake Delicious! :D


Happy Baking!!

Thursday, November 25, 2010

Idea Book

Happy Thanksgiving!! 
A few weeks ago I was going through my Amazon wish list and I move one of my wanted books to the cart but I didn't complete the purchase. To my surprise the next day I read through a post on Facebook that my dear friend Layla from Layla Pegado Cakes is featuring  on this amazing book with 5 of her wonderful cakes! I'm so happy for her! She deserves too much! I bought the book and now I just can't wait to see her and ask for her autograph! :D
The book is great, click here to buy or take a peek.
Happy Baking!!

Sunday, November 21, 2010

Cake Pops & Cupcake Bites

Wow, I have so much to tell you guys… so much to post! A lot is happening. Well, as the famous saying goes: I'll start from the beginning ... hahahaha...
So, my sister-in-law Melissa came to visit us here and I already had the idea to make some cake pops again to test a new recipe and a new technique. And nothing better than having the family to test my new cake pop .. hahahahahaha ... The result? I loved it!!! This time my pops did not fall from the sticks and after a week (yeah… I think I did 50 pops, including cupcake bites and cake pops) they are still wonderful and super delicious. It seems that the more time passes the batter gets better and more yummy, the chocolate around them protects the batter.
Mel loved it and my cupcake bites made a big success. For those who do not know, cupcake bite is like a mini cupcake just that it's chocolate covered "head to toe." The baking cups are made out of chocolate and so is the frosting.
It's almost Thanksgiving so I gave some cake pops and bites as a gift for Shannon which is a very special person to us here as thanks for all she does for us.
The batter of the pops and bites is Devil's Food Cake with "brigadier" (a brazilian candy, it's like a toffee). For the recipe just go to my friend's Luciana Blog or click here.
My Cake Pops:
Cake Pops coated with purple sugar and decorated with purple bows.
This I did for my son just for fun… its an owl. It is kinda cute but the next will be better …
Brigadeiro Cake Pops with Chocolate Jimmies and a colorful one... oops, I see a little boy's hand there.. ;P
And here are my Cupcake Bites: aren't they cute? :)
So many of them.... 
Look at it in detail: you can clearly see the chocolate baking cups here...
My inspiration? Bakerella, of course.... ;P

Happy Baking!!

Sunday, November 14, 2010

Lemon Ricotta Cookies and my "Artisan" Bread

Hi guys, sorry for the long time without writing to you. But I'm baking a lot and I think you are going to like my posts from now on... :D
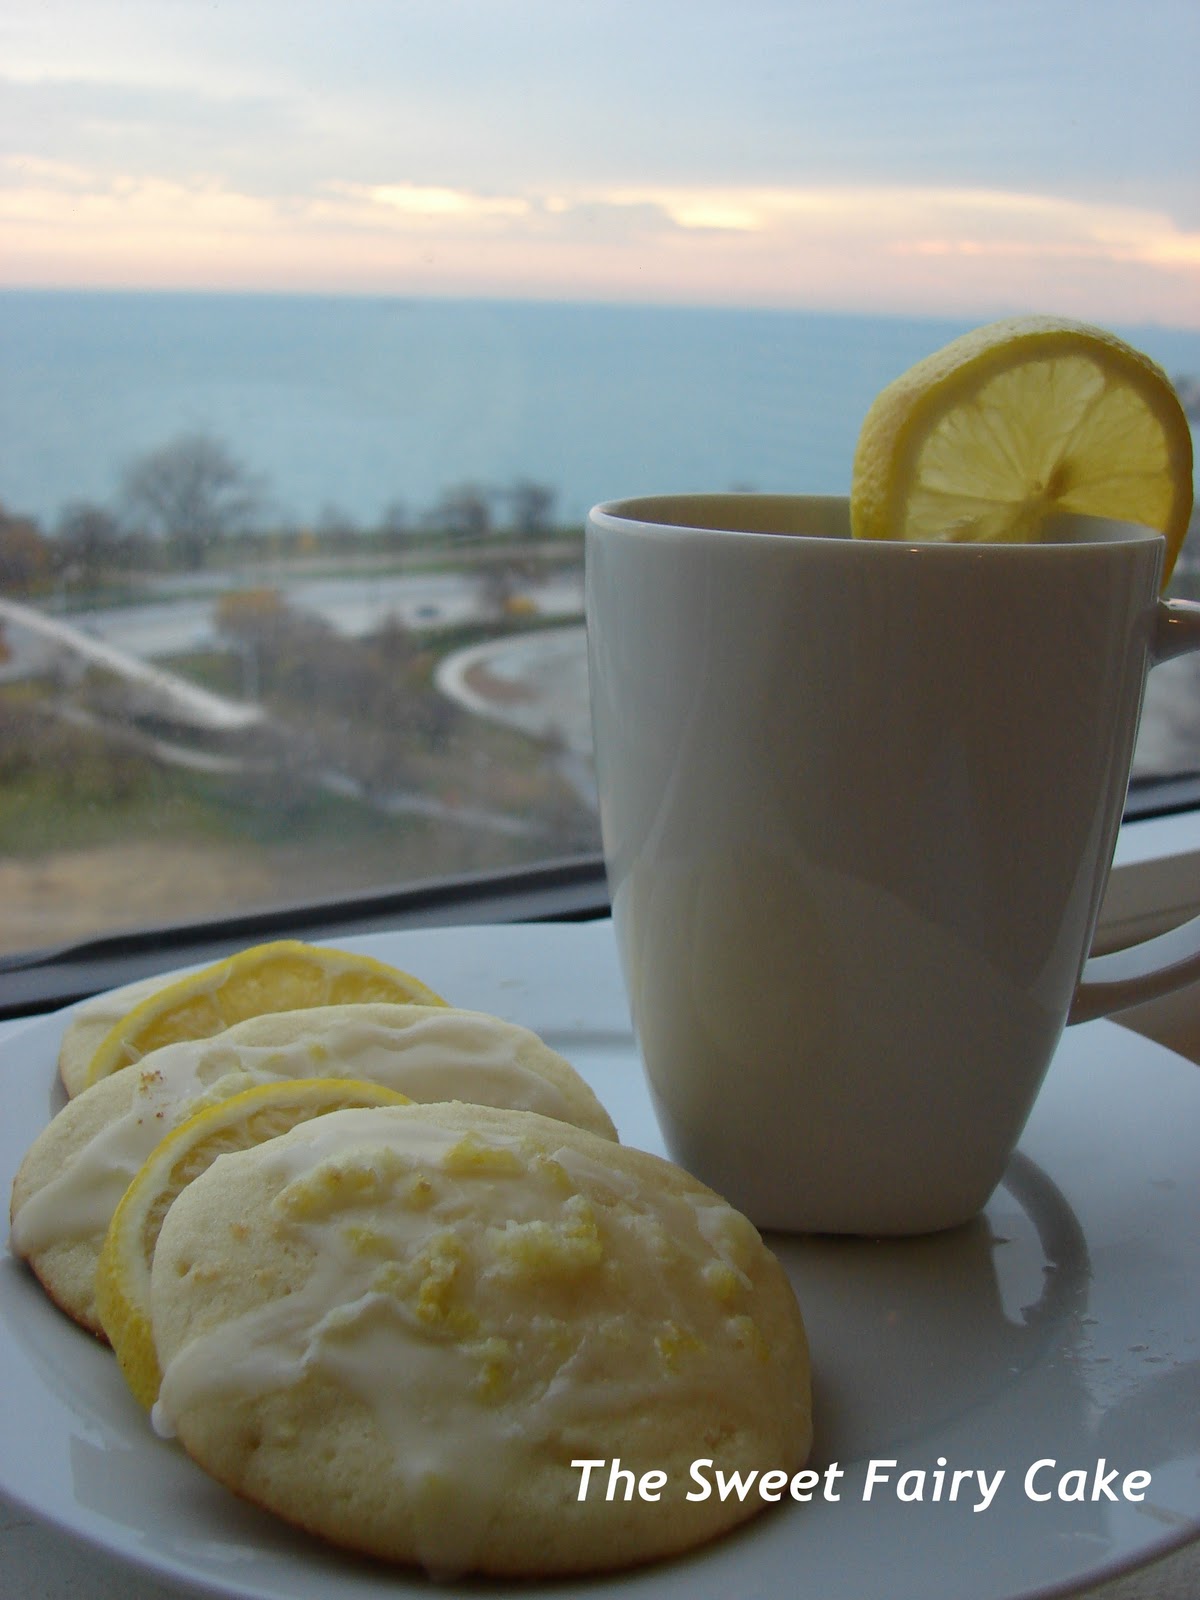
So last Thursday on my cake decorating class a dear friend brought some homemade Lemon Ricotta Cookies and I just fell in love with it. I'm not going to lie to you... I even dreamed about those cookies (am I crazy?? Maybe...). She will send me her recipe but I just couldn't wait! I had to have the cookies!! I just felt that I has just like Cookie Monster... lol... Anyway, I searched for the recipe online and I bake them. But my friend's cookies where way better than mine. I'll wait for her recipe. But with you want to check it out here is the recipe that I got from Food Network site.
I also baked some homemade bread. One of my dear friend Luciana just started to blog. She's a sweetheart and is a newlywed brazilian girl who is currently living in the US. She baked some bread and I immediately wanted to bake some too... her pictures where so yummy!! Hmmm.... Check out: 
Beautiful pictures and wonderful food!! :D


Here is my bread:


And my cookies:


Perfect for a chilly day....


Lemon Ricotta Cookies with Lemon Glaze
Ingredients
Cookies
2 1/2 cups all-purpose flour
1 teaspoon baking powder
1 teaspoon salt
1 stick unsalted butter, softened
2 cups sugar
2 eggs
1 (15-ounce) container whole milk ricotta cheese
3 tablespoons lemon juice
1 lemon, zested
Glaze
1 1/2 cups powdered sugar
3 tablespoons lemon juice
1 lemon, zested
Directions
Preheat the oven to 375 degrees F.
Cookies:
In a medium bowl combine the flour, baking powder, and salt. Set aside.
In the large bowl combine the butter and the sugar. Using an electric mixer beat the butter and sugar until light and fluffy, about 3 minutes. Add the eggs, 1 at a time, beating until incorporated. Add the ricotta cheese, lemon juice, and lemon zest. Beat to combine. Stir in the dry ingredients.
Line 2 baking sheets with parchment paper. Spoon the dough (about 2 tablespoons for each cookie) onto the baking sheets. Bake for 15 minutes, until slightly golden at the edges. Remove from the oven and let the cookies rest on the baking sheet for 20 minutes.
Glaze:
Combine the powdered sugar, lemon juice, and lemon zest in a small bowl and stir until smooth. Spoon about 1/2-teaspoon onto each cookie and use the back of the spoon to gently spread. Let the glaze harden for about 2 hours. 


Happy Baking!!

Tuesday, November 2, 2010

Splenda Chocolate Cupcakes

Hi guys!! Couple weeks ago I tried to bake some cupcakes for a dear friend of mine that have pregnancy diabetes. So I decided to use granulated Splenda insted of the regular sugar. The result was okay. The actual cupcake turn out good (I guess I prefer with the Sugah... hahahaha) but I also tried to substitute the sugar for the Splenda on the Swiss Merengue Buttercream. And that I didn't like it. I mean the consistency was fine but when I added some food coloring to it I don't know what happened but the frosting became kinda bitter... But I'll continue trying to bake the perfect sugar-free cupcake and frosting! Here's the tutorial.

The Swiss Merengue Buttercream I got on the blog: How to Eat a Cupcake: http://www.howtoeatacupcake.net/2008/02/face-your-smbc-fears.html and I jut substitute the sugar for the Splenda...

Splenda Chocolate Cupcakes (adapted from Rose's Heavenly Cakes)
Ingredients
1/2 cup plus 1 tablespoon (sifted before measuring) unsweetened cocoa powder
1/2 cup boiling water
2 large eggs at room temperature
3 tablespoons water
1 1/2 teaspoons pure vanilla extract
1 2/3 cup cake flour or bleached all purpose flour, sifted into the cup and leveled off
1 cup Splenda granulated sugar
2 teaspoons baking powder
1/8 teaspoon baking soda
1/2 teaspoon salt
12 tablespoons (1 1/2 sticks) unsalted butter

1. Preheat oven 20 minutes before baking to 350F
2. Mix the cocoa and the boiling water: in a small bowl, whisk the cocoa and the boiling water until smooth. Cover with plastic wrap to prevent evaporation and cool to room temperature or you can place in the refrigerator to speed the cooling process. Just bring to room temperature before proceeding.
3. In a small bowl, whisk the eggs, the 3 tablespoons water and the vanilla, just until combined.
4. In a stand mixer with the flat beater, add:
 - the flour, 
- Splenda, 
- baking powder, 


-baking soda 


-and salt 

then mix on low speed for 30 seconds. 
5. Add the butter and chocolate mixture and mix on low speed until the dry ingredients are moistened. Raise the speed to medium and beat for 1 1/2 minutes. Scrape down the sides of the bowl.
6. Starting on medium-low gradually add the egg mixture in 2 parts. Beating on medium speed after each addition.
7. Pour the batter into the baking cups and bake for 20-25 minutes. 
Hint: I like to measure the amount of batter to put exactly the same amount in every the baking cups.

Another thing that I noticed is that they broke on the top but the frosting covered it....
I hope you enjoyed!!

Happy Baking!!

Friday, October 29, 2010

Bzzz Bee Cake


The bzzzz bees on spot!

Hi guys, how are you? Yesterday was the final class for the flower course from Wilton. Again we had to make a cake iced with buttercream and use the techniques that we learned during the course.
I made a carrot cake with raisins frosted and filled with "real" white chocolate buttercream that my dear friend Layla taught me.  To decorate I made fondant flowers in three shades, some leaves and three little cute Bees (that I did using the tutorial on the blog: http://chiccookiekits.blogspot.com/). I also used the classic Wilton technique: the "basketweave". I twas pleased with the result..., what do you think?
One important detail: I used this amazing real buttercream (no crisco on it) and it is real light and fluffy but the fondant flowers got a little heavy for the buttercream so they weighed too much and pushed down all the buttercream ... Luckily, I managed to take pictures of the entire cake before going all down! …lol… live and learn right people?
The cake... I guess you guys can see that is starting to collapse here... :( 
The flowers..
Next week begins the Fondant Course! Woohoo! Finally! :)

Happy Baking!!

Monday, October 25, 2010

Halloween Cupcakes


My Halloween Cupcakes with my Pumpkin for the Jack-o-Lantern

BOOO! Halloween is on Sunday! My son already has his costume for the kids party at the Kids club in the building. To celebrate Halloween I baked diet chocolate cupcakes with diet frosting as well. It was good, but guys to be really honest with you I gotta say: there's no way to replace sugar huh? :P
The witch hat, your legs and shoes I did with modeling fondant. The shoes I made using the idea of this blog: http://chiccookiekits.blogspot.com I'm in love with this blog! There's a lot of tutorials on it! 
My witchy hat! 
Poor witchy... she got "eaten" by the cupcake... the details on the shoes... inspired by the Wizard of Oz
"EEK" 
Boooooo
Happy Halloween!!! 


Happy Baking!!


Saturday, October 23, 2010

Le Cordon Bleu + Cookies + Confections


Hi guys, sorry for my absence! I am doing a thousand things at once and I'm with a lot of new ideas to bring to you! 
But this post is about my second class at Le Cordon Bleu! : D On a super cold morning, and waiting for the train, I went to my class ...

The class was about cookies and confections. I really don't need to say I had a blast and I loved, right? ..lol... I just need to apologize for the poor quality of the photos. When I got there I realized that I had forgotten my camera at home so I had to use my cell phone .... sorry...
What was in the menu? 

.Rugelach: Delicious, we make the dough with cream cheese and it's filled with jam. My I fill mine with raspberry jam. So yummy!!!

.Christmas Tree Bark: Oh, that is to die for! It is a super simple cookie to do, just melt semi-sweet chocolate and white chocolate, place in baking sheet and sprinkle over that sow crushed peppermint candy. Then just leave in the freezer and break it with your hand...

.Palmier: I love it and my mother love it too! Hmmm ... delicious!

.Reindeer tracks: this is a cookie that takes oats, brown sugar, white chocolate and dried cherry .. need to say anything else? 

.Finally I also made the classic Sugar Cookies, but that I didn't took a picture of it...:(

Did you like it?? Now I want you to know which recipe you prefer me to post! I'll be waiting! :)

Happy Baking!!

Friday, October 15, 2010

Go Bananas!!


I need to start this post telling you a secret: I hate bananas! I even hate the banana smell. But I learned to make a banana cupcake that I really liked it! So now I decided to share this recipe with you and this post goes especially for a dear friend of mine which I don't know personally but who has won a piece in my heart, Michele Pazo from Michele Pazo Cake. You guys should visited her blog! She's very talented and she a sweetheart! To visit her blog just click here.

Banana Peanut Cupcake with Milk Chocolate Buttercream (The Chopping Block)
Ingredients
3 large bananas 
1 teaspoon lemon juice
1/2 cup milk 
1/4 teaspoon vanilla extract
2 cups all purpose flour 
1/4 teaspoon salt
1/4 teaspoon baking powder
3/4 teaspoon baking soda
1 stick unsalted butter, softened
1/2 cup natural peanut butter 
1 cup brown sugar
1/2 cup sugar 
2 large eggs
1 cup roasted peanuts, chopped

How to make
1. Pre-heat the oven temperature at 350F and prepare cupcake liners in a muffin pan.
2. Mash the bananas well. Add the lemon juice, milk and vanilla. Set aside.
3. Mix flour, salt, baking powder, baking soda with a spatula or a whisk.
4. In mixer, beat butter and peanut butter with the sugars until mixture is smooth and light. Beat in eggs, one at a time, beating well after each addition.
5. Add alternately dry ingredients and liquids to the butter and peanuts cream. Start by placing the dry ingredients and finish with the dry as well.
6. Fold in 1/2 cup of the chopped peanuts. Reserve left over to decorate cupcakes - if you want, of course ... :)
7. Bake cupcakes for 20-25 minutes. let cool completely to decorate.

Milk Chocolate Buttercream  (The Chopping Block)
Ingredients
4 1/2 ounces milk chocolate 
3/4 cup sugar 
2 tablespoons water
5 egg whites
3 sticks unsalted butter, softened
3/4 teaspoon vanilla extract
1/2 teaspoon salt

How to make
1. Melt chocolate in double boiler. Remove from heat and let cool.
2. In a small saucepan combine sugar and water. Boil without stirring (!!!) until temperature reaches 240F (yes, you will need a candy thermometer) on a candy thermometer.
3. Meanwhile, in an electric mixer, beat the egg whites until very foamy.
4. Once the sugar is ready, reduce speed and add the hot syrup into the egg whites. Increase speed and beat until it reaches room temperature. This process should take 10-15 minutes.
5. Add the butter one tablespoon at a time and then add the melted chocolate, vanilla and salt. Beat until all ingredients are well incorporated and fluffy.

I hope you enjoy!!

Happy Baking!!